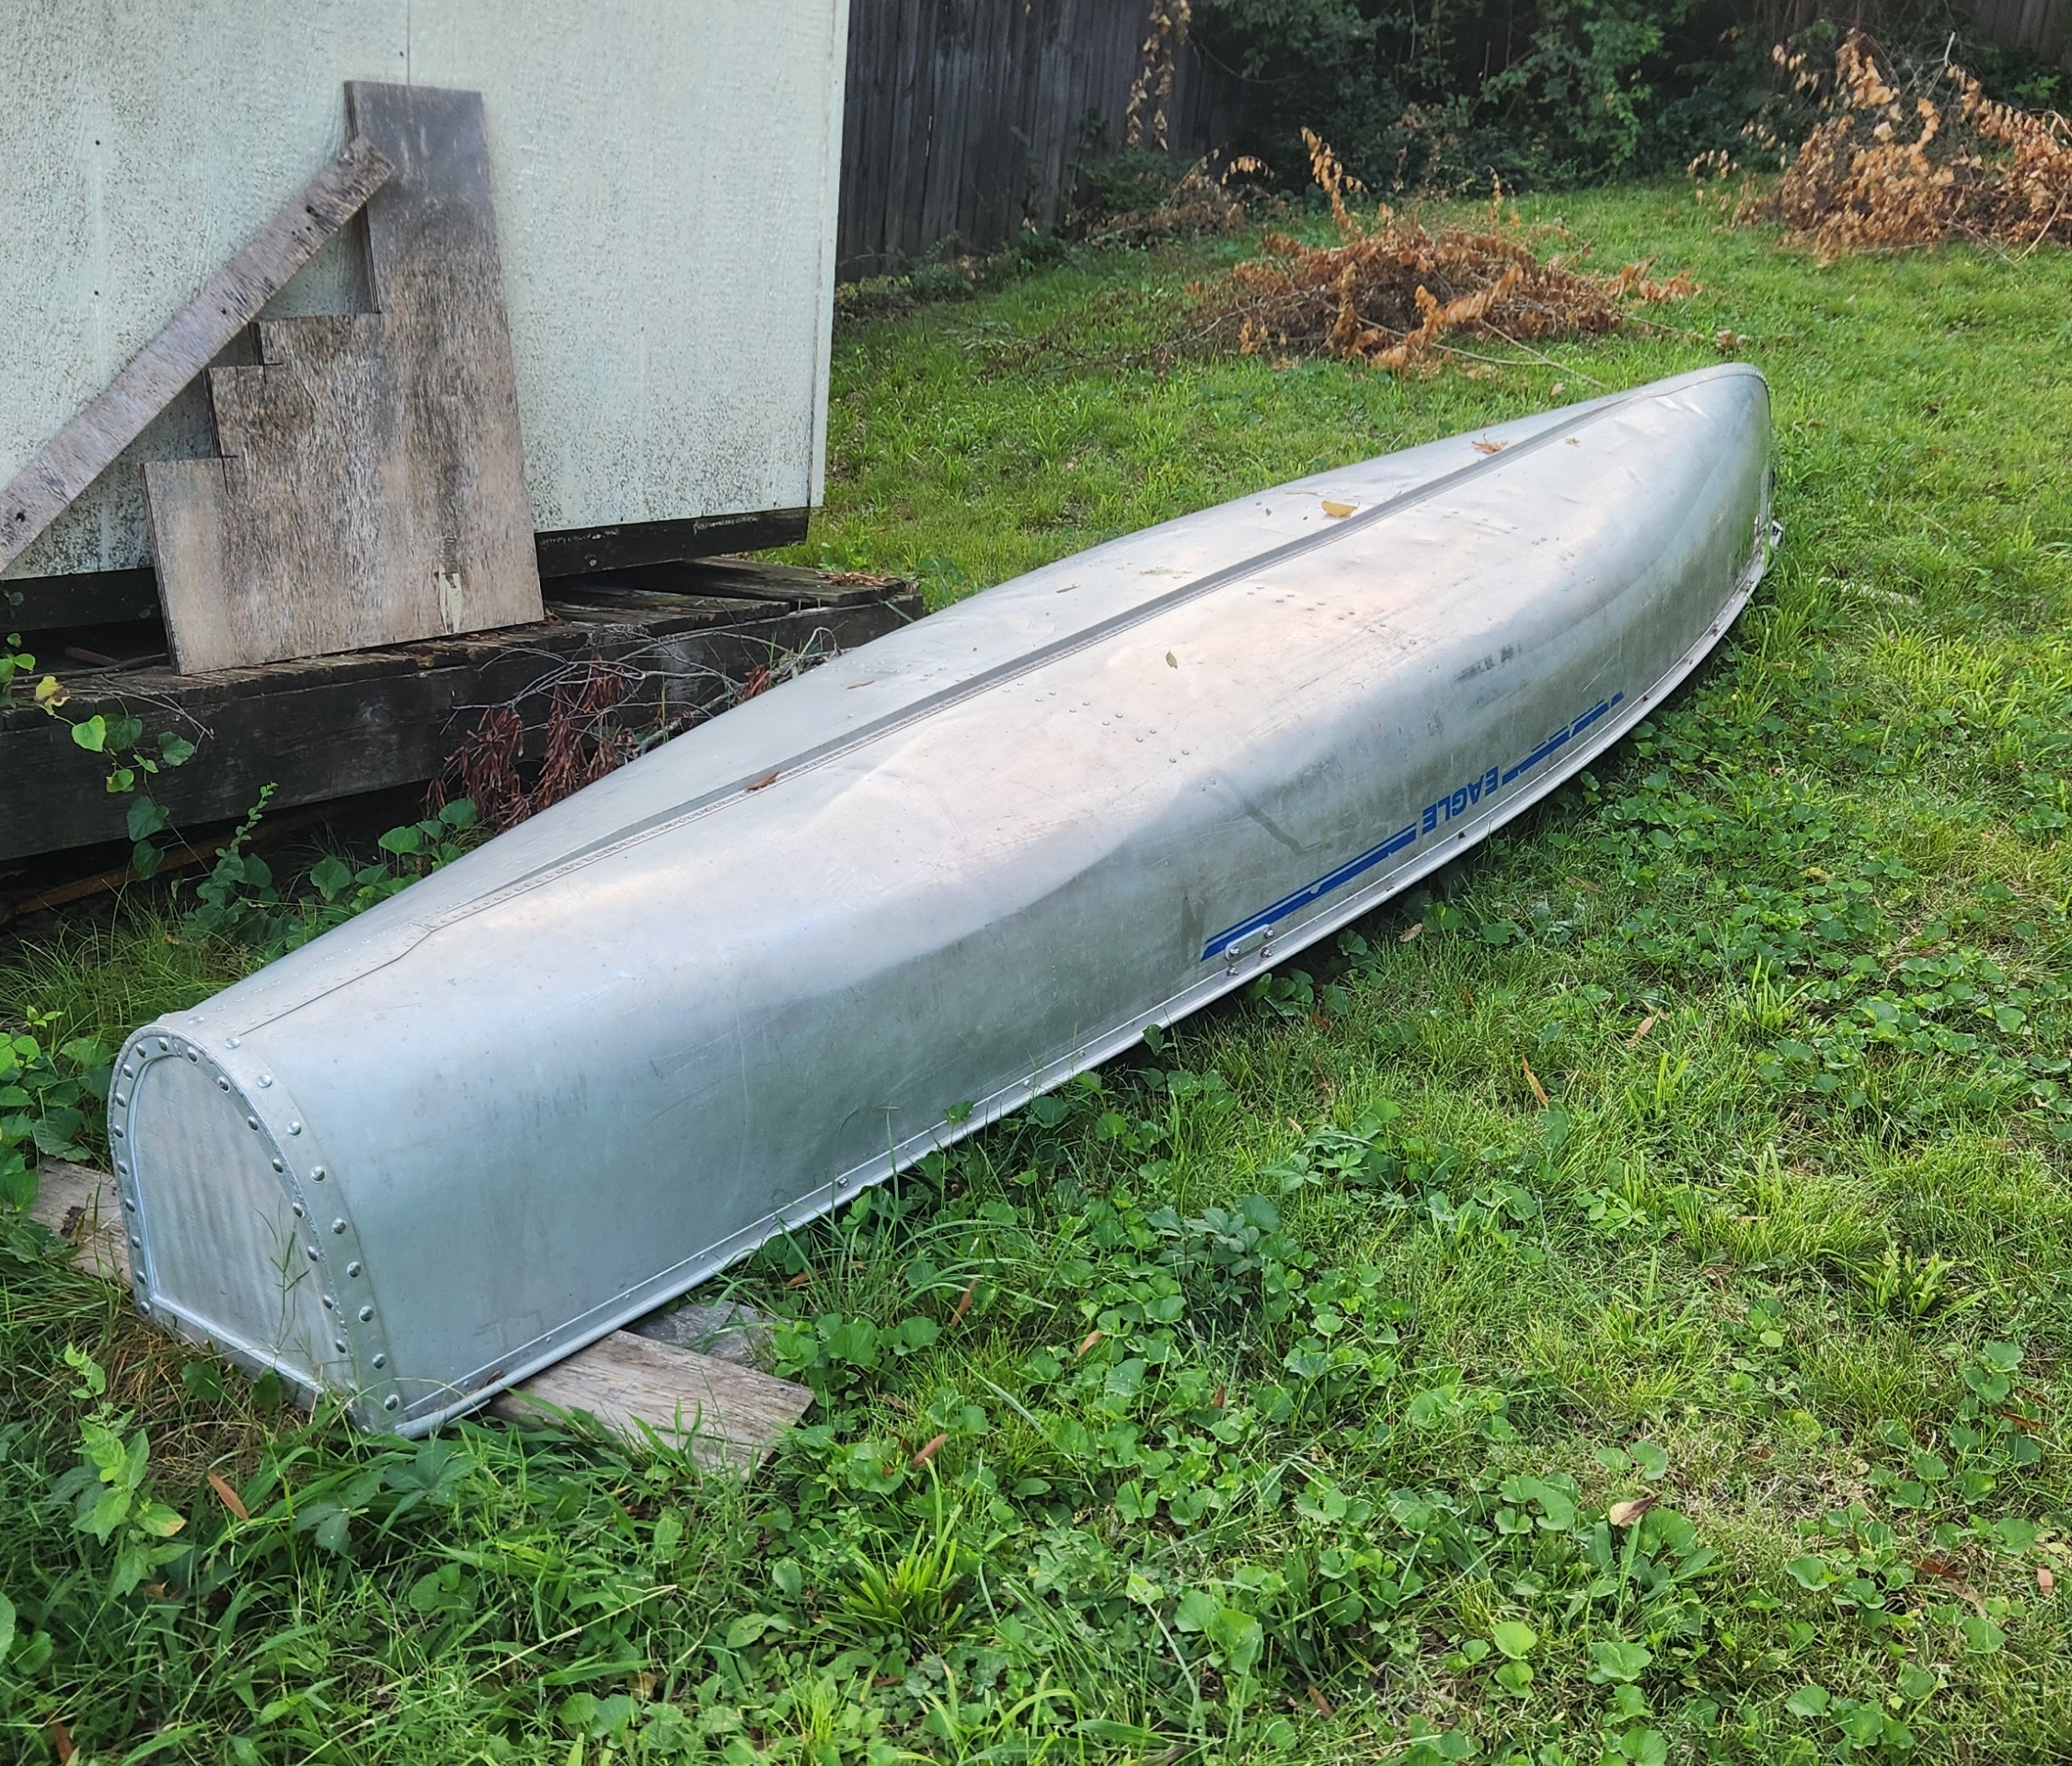
<?xml version="1.0" encoding="utf-8"?><feed xmlns="http://www.w3.org/2005/Atom" ><generator uri="https://jekyllrb.com/" version="3.10.0">Jekyll</generator><link href="https://bastruttman.com/feed.xml" rel="self" type="application/atom+xml" /><link href="https://bastruttman.com/" rel="alternate" type="text/html" /><updated>2026-10-04T19:11:49+00:00</updated><id>https://bastruttman.com/feed.xml</id><title type="html">Bryce’s Blog</title><subtitle>This is my &apos;blog&apos; and a space for the things I&apos;m thinking about.</subtitle><author><name>Bryce Struttman</name><email>bastruttman@gmail.com</email></author><entry><title type="html">Latest Read: Mercury Service Manual 4/5/102cc Sailpower</title><link href="https://bastruttman.com/read/Latest-Read-Mercury-5HP/" rel="alternate" type="text/html" title="Latest Read: Mercury Service Manual 4/5/102cc Sailpower" /><published>2026-09-09T00:00:00+00:00</published><updated>2026-09-09T00:00:00+00:00</updated><id>https://bastruttman.com/read/Latest-Read-Mercury-5HP</id><content type="html" xml:base="https://bastruttman.com/read/Latest-Read-Mercury-5HP/"><![CDATA[<p>I recently bought a 17 foot Grumman Eagle flat stern canoe off of Marketplace. It’s huge, but it sits on the RAV4 like a dream. I’ve floated it and it does float nicely despite a pretty significant patch job on the flat stern. The flat stern may be an aftermarket job. this is all to say that the canoe is everything you could want for the price of a couple hundred bucks and some paddles. There’s really only one thing to do that can improve this already immaculate 40 year old canoe. We’re going to be putting a motor on the back of it so that my sweet girlfriend doesn’t have to paddle it up and down river with me.</p>

<figure class="image-right"><a href="/assets/images/boat.jpg" class="image-popup"><img src="/assets/images/boat.jpg" alt="Canoe" /></a></figure>

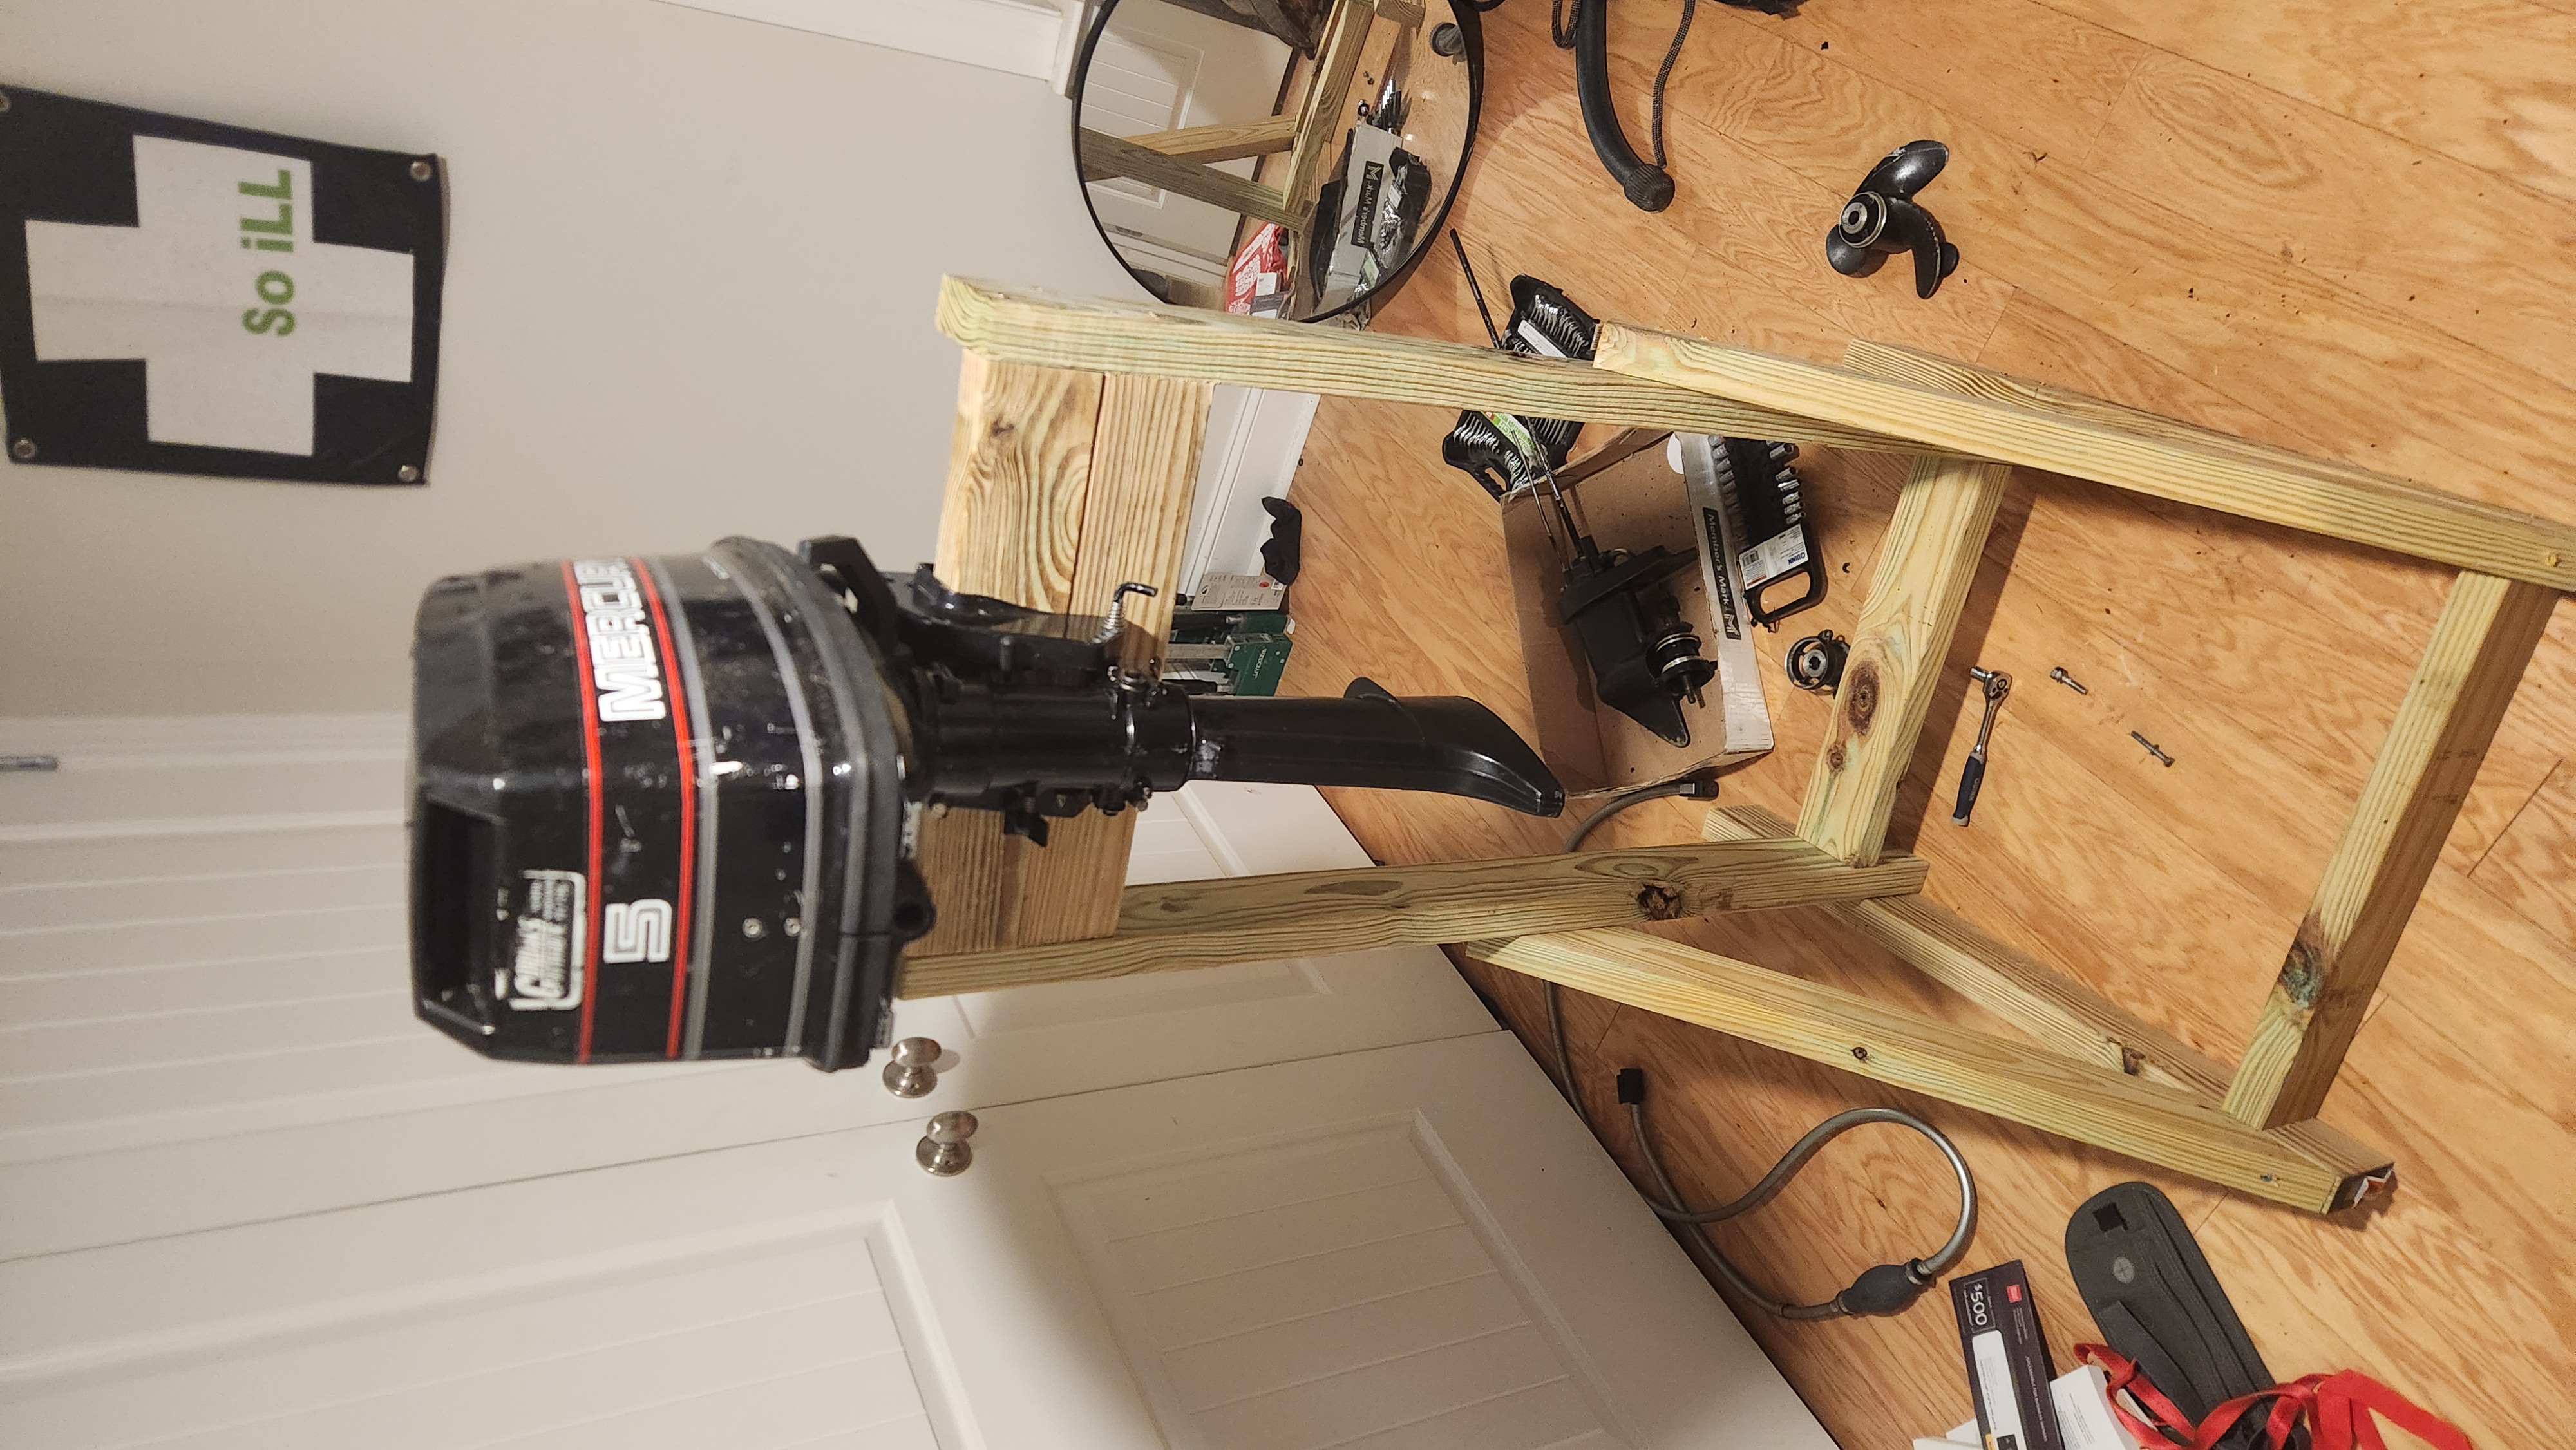
<p>So I bought a 5 horsepower outboard motor for $200 with a broken lower unit. The propeller shaft housing (also called the bearing housing) was ripped off of the lower unit housing at the bolt, I suspect the kid that had it before me ran it into something hard and instead of the prop taking the hit the housing did. After a bit of research I bought an aftermarket replacement part online for $25 and replaced it. It was a minor struggle to get the lower unit back into the engine but after some consultation from my girlfriend I got everything assembled and ready for the motor to start. This is where things really begin.</p>

<div class="image-clear"></div>

<figure class="image-left"><a href="/assets/images/motor.jpg" class="image-popup"><img src="/assets/images/motor.jpg" alt="Mercury outboard motor" /></a></figure>

<p>I’ve never started a motor that wasn’t in a car or a lawnmower so a two-stroke on an outboard motor was completely new to me. Despite my lack of experience I pumped the external tank primer and ripped the recoil starter and it came up easily only to die after about 20 seconds. Hmm… If you know anything about motors you probably have some ideas already as to what could be causing this problem. An engine needs 3 things to run, fuel, air, and spark. The spark is handled by the spark plug and since it starts up we can reasonably assume we have a solid spark. On modern car engines we have electronic fuel and air mixing but on older and smaller motors like this one we have a carburetor that feeds the cylinder the appropriate mix. Somewhere before the fuel/air mixture gets into the cylinder we are getting a bad ratio. This causes our motor to bog down and eventually die. This can be caused by a number of things but we start at the carburetor.</p>

<p>The carb is what mixes your fuel and air as you pull your throttle higher and lower. Old fuel can stick around in the carb and turn to varnish which clogs the very small holes in your carburetor and changes the amount of fuel that can come through your carb. So I take apart the carb and wouldn’t you know it? It’s clean. No residue to be found. That’s strange. I spray it out with carb cleaner and put it back on the motor just to be safe. Pull the cord, nothing. Ok where else can we get air introduced where it shouldn’t be? These fuel lines are probably over 30 years old and they’re rotting off of the so let’s try changing those out next.</p>

<div class="image-clear"></div>

<p>A trip to O’Reilly’s, learn how to replace fuel lines (it’s not hard), figure out how to use the hose clamps , put the fuel filter back on, start the motor. And? Nothing. Still dying.</p>

<p>Hmm. The carb is probably 30 years old and the built-in fuel pumnp relies on very thin rubber layers to make a diaphram that pulls and pushes fuel into the carb. If your fuel pump has gone bad you can hand pump your primer bulb to get fuel into the carb but once the carb burns all of this fuel you run out and the engine dies. Sounds promising. A new gasket/diaphram kit is $30 but a whole new carb is $50. I get a brand new carb on Ebay and wait a few days. In the meantime I read the sections in my manual on taking apart the cylinder and piston, check the compression (compression is great), and replace the spark plug all according to the handy manual.</p>

<p>New carb is installed and I dig into the section titled “Fuel System -&gt; Carburetor Adjustments -&gt; Approximate Initial Settings” We set these initial settings and … hang on … we’ve got a decently smooth idle for longer than usual. Ok maybe I didn’t adjust the original carb well enough or maybe the new one is the trick. Who cares, it’s better now. The idle is choppy so we push the idle speed screw more. Better. Low Speed Mixture screw gets pulled back for a richer mixture. Ok even better now. We’re starting to look better and better. But hang on, we’re not out of the woods yet. It dies when we put it in gear and sometimes it stutters when I bring it back down to idle.</p>

<p>Well it’s time for a confession. I thought (erringly) that gas station fuel was made of 100% gasoline, why would they call it gasoline if it wasn’t all gasoline? It’s not the case. Gasoline you put in your car has 10% ethanol in it which means it’s less explosive than 100% gasoline. Take a wild guess what I’ve been putting through my motor this entire time. Hmm. Ok well our low power could have something to do with this. And what’s that? Our external gas tank fuel line is leaking and the clamp is loose? Oh ok. Maybe we’re getting somewhere.</p>

<p>Finally I grab the external fuel line. It squishes in my hand. Not good, fuel line should be pretty rigid. Ok, I’ll cut it open and see what it looks like inside before I buy a whole new external fuel kit. Oh no. the inner lining is completely collapsed. The engine has been turning on with my priming and then failing because it couldn’t pull a strong enough vacuum through the collapsed lining. I cut out the collapsed section and we try it again. Runs perfectly. Runs like a dream. Runs like you wouldn’t believe.</p>

<p>This was a completely foreign experiment for me. I’d never even started an engine much less fixed one and now I’ve changed out everything short of the cylinder, rebuild a lower unit, and learned alot about outboard motors. And all under about $400 for parts, fluids, and the motor itself.</p>]]></content><author><name>Bryce Struttman</name><email>bastruttman@gmail.com</email></author><category term="Read" /><summary type="html"><![CDATA[Adventures in small engine repair]]></summary></entry><entry><title type="html">Things I like</title><link href="https://bastruttman.com/Things-I-Like/" rel="alternate" type="text/html" title="Things I like" /><published>2025-10-01T00:00:00+00:00</published><updated>2025-10-01T00:00:00+00:00</updated><id>https://bastruttman.com/Things-I-Like</id><content type="html" xml:base="https://bastruttman.com/Things-I-Like/"><![CDATA[<h1 id="writing">Writing</h1>
<p>I love pens and good paper</p>
<h2 id="fountain-pens">Fountain Pens</h2>
<p>Pilot Vanishing Point ($160) - There has never been a better all-around daily pen in history. The click is satisfying, the nib takes a beating, you can throw it anywhere you want and it will write even after some time off. I’ve brought mine all over the world and write with it nearly daily after 5 years of having it. There are some Chinese knock-offs I think JinHao had one that was so close you could interchange parts but the Japanese Pilot way outdoes it. The nib is much smoother and flows ink much better. I got mine for $160 but they’re up to $180 now.</p>

<p>Pilot Metropolitan ($20) - The best intro pen, better than the Lamy Safari IMO. It has a finer nib and better flow and doesn’t feel as cheap as the Lamy’s plastic. Great pen and you can beat the hell out of them.</p>

<h2 id="pencils">Pencils</h2>
<p>Blackwing ($5) - Excellent pencils, great shape and I love the rectangular eraser. You can really get into their whole ecosystem if you want and get their sharpeners and eraser spares but the pencils themselves go a long way on their own. I have no 2 lead but the real draw is the quality of the pencil so I think any lead will do.</p>

<p>Mechanical Pencil - Pretty much anything will do so long as it’s 0.7mm and has an eraser. I used a brand called Poppin in college that I only ever saw in the Iowa State MU bookstore and have never seen since. The pencil was fully gold colored and just the right size. I thought it looked nice to have that alongside my black Pilot Vanishing Point. They’re $16.50 for a set of two and the quality doesn’t warrant that so they’re purely an aesthetic choice for me.</p>
<h2 id="modern-pens">Modern Pens</h2>
<p>Rotring 300 Ballpoint - Such a solid feel, great pen, fun to write with, just amazing to carry in your pocket. Having that weight in your pocket is so nice, it’s like carrying a soothe-stone with you. I never liked the cartridges that came with these pens, it might be because I’m used to fountain pens that I expect a really smooth writing experience but I always felt like I had to press really hard to get this pen to write. I’d like to get a refillable cartridge that takes fountain pen ink and try that in this pen. Otherwise outstanding writing experience. I’d love a 300 Fountain pen but they were $400 last time I checked because they stopped being made in the 80s.</p>

<h2 id="paper">Paper</h2>
<p>Rhodia Rhodiarama Soft Cover ($30) - Rhodia is an incredible brand owned by Clarefountaine and made in France, they’ve got great paper and really consistent quality. To my knowledge these specific notebooks are discontinued as they do not show up to purchase on Goulet’s website anymore but the stationary stores online still carry them as of September 2025 so there are a few left. I use mine for daily task lists, bullet journaling, and whatever else I need a quick place to take notes. Love the 90g coated paper, nothing feels smoother. Takes fountain pen ink like none other and always feels great to write in. I’ll probably stock up on a ton of these and have them for the next few years. After all the rest are gone the closest replacement for the Rhodiarama is probably going to be the webnotebook series. And as if it needs to be said obviously we’re using dotgrid ruling.</p>

<p>MD Paper MD Notebook Light - Great paper for drawing, Field Note sized, probably A6 but maybe a little thinner and taller than true A6. If they had notebooks with rules I would probably try this brand for everyday bullet or regular journaling but they don’t offer that. Japanese, simply, quality, can’t beat it.</p>

<p>Rhodia Classic Side Staplebound A4 Notebook - Black Dot Grid. Nothing on earth beats this notebook. The size of it fully spread out is like looking out into an open field; the entire world before you. I think in college I used to get them for $5 a piece and I would clean out the store in Des Moines. They’re $7.70 now, still a steal. For a long time I had 6 or 7 of them stocked up ready to go but I sullied many of them by writing for classes or work notes in them. I exclusively use these for journaling (my feelings) and brainstorming now. Rough outlines, todo lists sometimes go in but they usually get transferred to the bullet journal afterwards.</p>]]></content><author><name>Bryce Struttman</name><email>bastruttman@gmail.com</email></author><summary type="html"><![CDATA[Why use things you don't enjoy using?]]></summary></entry><entry><title type="html">A Review of Outlive, by Peter Attia</title><link href="https://bastruttman.com/Outlive-Book-Review/" rel="alternate" type="text/html" title="A Review of Outlive, by Peter Attia" /><published>2025-03-16T00:00:00+00:00</published><updated>2025-03-16T00:00:00+00:00</updated><id>https://bastruttman.com/Outlive-Book-Review</id><content type="html" xml:base="https://bastruttman.com/Outlive-Book-Review/"><![CDATA[<p>Actionable suggestions and other insights from Peter Attia’s Outlive</p>

<p>First, my review. It’s a good book, I really liked the ending where he talks about living a life that’s worth living and building your obituary resume instead of your achievements resume. There’s a lot of good advice in here for the layman, it could be boiled down to a checklist but the anecdotes go a long way to hammer the advice home.</p>

<h1 id="basic-premises">Basic Premises</h1>
<p>Medicine 2.0 is the current paradigm in medicine. It focuses on acute treatment of disease and extending life at the last second. We can start now on Medicine 3.0 which focuses on prevention and increasing both our lifespan (time lived) and healthspan (time with quality life).</p>

<p>The ruiners of lifespan are broken down into 4 categories Peter calls the 4 horsemen.</p>
<ul>
  <li>Diabetes type 2</li>
  <li>Cancer</li>
  <li>Alzheimer’s and other dementia types</li>
  <li>Heart Disease</li>
</ul>

<p>All of these are heavily influenced by your diet and lifestyle. NAFLD or non-alcoholic fatty liver disease is a precursor to all of these and a direct result of metabolic dysfunction. They are also all influenced by insulin resistance.</p>

<p>Across the board Attia argues that exercise will be your number 1 driver of health. Do everything you can but if you have to start somewhere start with exercise.</p>

<h1 id="exercise">Exercise</h1>
<p>Zone 2 Cardio - zone 2 cardio improves the body’s ability to burn fat and helps to maintain good glucose levels and insulin sensitivity. 
Aim for at least 2 hours per week but there really isn’t an upper limit on the amount of zone 2 you can do. Especially if you’re overweight or NAFLD adjacent.</p>

<p>V02 Max - V02 max is a good predictor of longevity and can be improved over time. Spend 4 minutes a few times a session at threshold once per week to improve V02 max.</p>

<p>Strength training - Strength training gets more important as one gets older. Maintaining muscle mass as one gets older is good for falls and for hanging on to things. Strength train at least 2 times per week but prefer 4+ times per week. Focus on your personal goals but important things for your healthspan are carries, squats/lunges, and grip strength.</p>

<h1 id="tests-and-indicators">Tests and Indicators</h1>
<p>Continuous Glucose Monitor - these were recently approved for non-prescription use in the United States. They can be purchased for less than $100 per month and are easy to install and monitor.</p>

<p>mTOR - a protein complex that regulates cell cleanup. When there is an abundance of calories mTOR is present and growth occurs. When mTOR is reduced growth stops and cells are cleaned and recycled. mTOR1 induces cellular autophagy (recycling) but mTOR2 induces reduced immune system. Cycling Rapamycin seems to help eliminate the immune system response. High weekly doses are better than low daily doses.</p>

<p>ALT - ALT is a liver enzyme that can indicate that the liver is under stress. Good levels are under 25 IU/l for women and 33 IU/L for men, these don’t reflect the modern ‘normal’ ranges but are adjusted to reflect healthy ranges. ALT can be found with a blood test.</p>

<p>ApoB + LDL - Testing these two via a blood test can tell you about your cholesterol as well as your risk for cardiovascular disease.</p>

<p>There are a ton of tests to be done but they’re all covered here in this <a href="https://www.reddit.com/r/PeterAttia/comments/194yfk2/all_the_medical_tests_in_outlive_with_target/">reddit post</a></p>

<h1 id="drugs-and-other-interventions">Drugs and other interventions</h1>
<p>Rapamycin - supresses the mTOR protein complex which allows cells to be cleaned and recycled.</p>

<p>Calorie Restriction - could induce mTOR reduction but not recommended as the lack of protein and other important cellular building blocks is likely worse in the long run.</p>

<h1 id="personal-insights">Personal Insights</h1>
<p>Peter puts a lot of emphasis on stability. I’m young now and really don’t see a lot of use in this in my own life currently. I think generally athletic people struggle little with stability and time can be spent strength training or recovering instead. Stability often forces people to relearn the movement patterns that they’ve known for a long time and have good practice in. The human body is nowhere near symmetrical so why try to make every single movement you do symmetrical to a T. Unless your technique is really bad you can probably skip.</p>]]></content><author><name>Bryce Struttman</name><email>bastruttman@gmail.com</email></author><summary type="html"><![CDATA[Actionable suggestions and other insights from Peter Attia’s Outlive]]></summary></entry><entry><title type="html">Shortened Practical Git Guide</title><link href="https://bastruttman.com/Shortened-Practical-Git-Guide/" rel="alternate" type="text/html" title="Shortened Practical Git Guide" /><published>2025-03-14T00:00:00+00:00</published><updated>2025-03-14T00:00:00+00:00</updated><id>https://bastruttman.com/Shortened-Practical-Git-Guide</id><content type="html" xml:base="https://bastruttman.com/Shortened-Practical-Git-Guide/"><![CDATA[<h1 id="motivation">Motivation</h1>
<p>I’m writing this becaue my first attempt was too long and included features that weren’t useful to my ideal user (my dad). What I thought was already shortened was not short enough and frankly didn’t cover the true simplest use case of Git. This guide is for someone who has a collection of files and wants a better way to version control than saving to a G-drive folder and changing a version number. You don’t need to use every single git function to make it useful so here’s the least amount of features you can use to get some value from Git.</p>

<h1 id="as-short-as-possible">As Short as Possible</h1>
<p>At the very center of Git is 3 simple operations, save/upload/download. If you are a one-person show with no risk of merge conflicts or writing on two machines at once this is what you need and <em>all</em> you need.</p>

<p>If you want to super-simplify use Github Desktop. But read the rest of this so that you know the context around the basic actions.</p>

<h2 id="repository-creation">Repository Creation</h2>

<p>Create your repository on Github. Don’t mess with Git init or anything like that. Once you’ve created your repository check the home page of the repo and copy the URL of it.</p>

<h2 id="download">Download</h2>
<p>Now go to your command line and run this command. This is your download.</p>

<div class="language-plaintext highlighter-rouge"><div class="highlight"><pre class="highlight"><code>git clone &lt;your_url&gt;
</code></pre></div></div>
<h2 id="save">Save</h2>

<p>Now go ahead and change some files. When you’re ready to save type this command.</p>
<div class="language-plaintext highlighter-rouge"><div class="highlight"><pre class="highlight"><code>git status
</code></pre></div></div>
<p>This will show you all of the changes you’ve made since the last time you committed. File additions, deletions, changes will all show up here. To submit these changes to be saved run this.</p>
<div class="language-plaintext highlighter-rouge"><div class="highlight"><pre class="highlight"><code>git add .
</code></pre></div></div>
<p>If you want to submit specific changes you can type file names in place of the period. Now to save use this command.</p>
<div class="language-plaintext highlighter-rouge"><div class="highlight"><pre class="highlight"><code>git commit -m "some message here"
</code></pre></div></div>
<p>This will ‘commit’ (aka save) your changes but only locally. Your message is how you will trace back and figure out what you changed when so make sure it’s descriptive.</p>

<h2 id="upload">Upload</h2>
<p>Finally to upload to your ‘remote’ repository (Github) use Github desktop. I know we were all command line up to this point but going through the rigmarole of issuing personal keys or god-forbid ssh certificates is too much for this tutorial.</p>

<p>When you want to get your code or work on another computer just do the git clone step again and you’ll have it wherever you need it.</p>]]></content><author><name>Bryce Struttman</name><email>bastruttman@gmail.com</email></author><summary type="html"><![CDATA[A practical guide to Git for single users who need bare minimum functionality.]]></summary></entry><entry><title type="html">Practical Git guide for people that don’t use it 40 hours a week</title><link href="https://bastruttman.com/Practical-Git-Guide/" rel="alternate" type="text/html" title="Practical Git guide for people that don’t use it 40 hours a week" /><published>2025-01-23T00:00:00+00:00</published><updated>2025-01-23T00:00:00+00:00</updated><id>https://bastruttman.com/Practical-Git-Guide</id><content type="html" xml:base="https://bastruttman.com/Practical-Git-Guide/"><![CDATA[<h1 id="setup">Setup</h1>
<p>For setup purposes I’ll assume you’re using windows but the instructions will work with any operating system, you just won’t be able to use the exact links here. If you are on Mac or Linux you’ll have to search for something like “Git install Mac”.</p>

<h2 id="installing-git--helpful-addons">Installing Git &amp; Helpful addons</h2>
<h3 id="git-and-git-bash">Git and Git Bash</h3>
<p>This link is for windows, pick the standalone installer. I’m sure you already know this but just for the sake of completeness I’ll mention exactly what I am using.</p>

<p><a href="https://git-scm.com/downloads/win">https://git-scm.com/downloads/win</a></p>

<p>If you want to remain on the command line the entire time you can run this command:</p>

<div class="language-plaintext highlighter-rouge"><div class="highlight"><pre class="highlight"><code>winget install --id Git.Git -e --source winget
</code></pre></div></div>

<p>Both of these will install the Git command line tool as well as a custom terminal called ‘Git Bash’. It’s useful for a few things. The first, it gives the user a very nice color palette that highlights what Git branch you’re on as well as Linux commands in case you’re more accustomed to them. It is not necessary, powershell and cmd both work just as well.</p>

<h3 id="git-gui">Git GUI</h3>
<p>The official Git project recommends a number of GUIs, old timers will tell you not to use them and to get used to the command line. I’ve met excellent developers who use either and some use a mix of both. While starting out it’s easier to visualize Git relationships using these tools. There are a ton of them but I’ve had most luck with the first two following.</p>

<p><a href="https://Github.com/apps/desktop">Github Desktop</a> The GUI I’ve used the most. Does not require you to be using Github, automates certifications for push and pull.</p>

<p><a href="https://www.sourcetreeapp.com/">SourceTree</a> The GUI I’ve seen used by the most professional developers.</p>

<p><a href="https://Github.com/FredrikNoren/unGit">UnGit</a> I’m not familiar with this one but the Github README is really good and the xkcd comic at the top sums up the Git experience nicely, even when using it alongside 25+ year developers. I’m switching to this one now just to see what it’s like. (Postnote: This is no longer maintained, it’s probably still ok because Git doesn’t change much but I would avoid for now. I did however learn about Chattanooga Open Data from this repository.)</p>

<p>You can use all of these, even all of them at once and pick whichever is simplest or you find the easiest to use.</p>

<h3 id="git-bash">Git Bash</h3>
<p>You can download Git Bash from the official Git project, it comes by default in the Windows Git installation.</p>

<p>Git commands will run in any shell (bash, powershell, cmd, zsh) but we want to use Git Bash. This shell mimics a bash shell (the shell used most frequently on Linux) and unifies the commands we’ll write. From here on the commands are the same on every operating system.</p>

<h1 id="git-explained">Git Explained</h1>

<p>For starters, Git is never simplified as it should be. People throw all sorts of insane terms at you right out of the gate so here’s what you really need to know. Git at its core cares about 3 things.</p>

<ol>
  <li>Repositories</li>
  <li>Branches</li>
  <li>Commits</li>
</ol>

<p>These three things, to Git, are nouns. Everything else in Git is a verb. Pull, Pushe, Clone, Fork, Merge, Rebase, everything you can think of is an action that effects your set of Repos, Branches, and Commits. THAT’S IT. The following sections will be sorted by these 3 nouns and the commands that are run on them.</p>

<h2 id="repositories">Repositories</h2>
<p>A repository is either a local or a remote copy of a Git project. It’s oftened shortened to the word ‘repo’. Your local repository is a copy of your entire project on your local machine. A remote repository is a copy of the project on a server. Having a local and remote copy allows you to make some change on a local machine and keep a copy remotely that can be shared with users, other contributors, or different machines.</p>

<h3 id="git-clone">Git clone</h3>
<p>When you use Git clone Git copies all of the files from the remote repository you point to and creates a .git file. Your .git file tracks your changes, the URL of your remote repository, your username, and other useful details for the project. THAT’S IT. The syntax for cloning is as simple as:</p>
<div class="language-plaintext highlighter-rouge"><div class="highlight"><pre class="highlight"><code>git clone &lt;your_project_url&gt;
</code></pre></div></div>
<p>This command only needs to be run once on your machine to get the project initiated. After that you can use the git pull command.</p>

<h3 id="git-init">Git init</h3>
<p>When you do Git init Git creates a new repository with no remote copy. Similar to git clone it creates a .git file that tracks important information about your project.</p>

<blockquote>
  <h3 id="practical-shortcut-1">Practical Shortcut 1</h3>
  <p>Your first practical shortcut. If you want to create a new Git project DON’T use Git init. Create a new project on Github first, clone it, add your files, commit and push to origin. If you Git init first you may struggle to make a new repo on Github and match it up with your local repo, you have to set an origin, create an upstream, blah blah blah. I remedy this by just never doing it.
<!-- {: .notice--warning} --></p>
</blockquote>

<h3 id="git-remote-add">Git remote add</h3>
<p>If you want to add a remote after running Git init or if you want to change the remote you’re pointing at you can use Git remote add. Because of the above practical shortcut you really won’t ever have to use this.</p>

<h2 id="branches">Branches</h2>
<p>A branch is a silo of code that (in best practice) contains the changes a developer wants to make for a single feature. Many developers also use specific branches for development, staging, and production.</p>

<blockquote>
  <p><strong>Practical Shortcut 2</strong></p>

  <p>If you are working on a solo project you probably don’t need to make any branches. “HERETIC! SINNER! MADMAN!” I hear you saying. To seriously simplify Git you can stick to commits, pushes, and pulls and treat them like save, upload, and download. Use just the main branch and forget about the rest until you really need it or you want to expand your horizons.</p>
</blockquote>

<h3 id="git-branch">Git branch</h3>
<p>Git branch can be used in a couple of ways.
<code class="language-plaintext highlighter-rouge">Git branch list</code>
Displays all of the branches available on your local.
<code class="language-plaintext highlighter-rouge">Git branch "branch name"</code>
Creates a new branch with the branch you are currently in as the parent branch, also known as the upstream branch.</p>

<h3 id="git-checkout">Git checkout</h3>
<p>Git checkout switches the Git user to the branch they specify.</p>
<blockquote>
  <p>[!warning]- Practical Shortcut 3
You can use checkout to both start a new branch and switch to it immediately by running:
<code class="language-plaintext highlighter-rouge">Git checkout -b "branch_name"</code>
I use this every time I want a new branch because I always want to switch to it.</p>
</blockquote>

<h3 id="git-merge">Git merge</h3>
<p>Getting to Git merge is when we introduce some complexity. Git merge takes the changes made in one branch and combines them into another branch. When you use Git merge you are merging INTO your current branch the changes FROM the branch you specify. In Git Bash this will look like this:</p>
<div class="language-plaintext highlighter-rouge"><div class="highlight"><pre class="highlight"><code>yourDesktopName MINGW64 ~yourWorkingDirectory (currentBranch)
$ Git merge brachYouWantChangesFrom
</code></pre></div></div>
<p>The default way a merge occurs is by introducing a commit where you describe the branches merged and organize the differences between your branches. You’ll often hear about ‘fast-forward’ merges, this is a special case wherein no changes have occurred on the branch being merged into. Git will do all of the merging for you, it basically simulates making the changes on the branch being merged into.</p>

<h2 id="commits">Commits</h2>
<p>While Git branches hold entire features, Git commits should hold small incremental code changes. Best practice is to make these small, only containing atomic changes, consider making a commit every time you would have clicked ‘save document’ in the 90s.</p>

<p>Commits are important because if you screw something up later on you are going to revert to a specific commit. Packing too many changes into a single commit will risk not being able to isolate your bad changes from the good ones.</p>
<h3 id="git-status">Git status</h3>
<p>We’re introducing new vocab here so sit tight. When you run Git status Git will present the changes that have occurred in your repository since the last commit. Some of these will be tracked and some will be untracked. Tracked means that you or another user have told Git about the file before. Untracked means the opposite. There are many cases you might want to not track a file such as generated sources, locale-specific settings, or files including secret keys.</p>
<blockquote>
  <p>[!note]- Untracked or Gitignore?
If you mean to keep files untracked you should add them to your Gitignore, this will keep Git from warning you that they are untracked when you run Git status.</p>
</blockquote>

<p>Git status will also show you which files you’ve modified and what commands you can run next to add these changes to your commit. Run <code class="language-plaintext highlighter-rouge">Git add .</code> to add all of the changes and untracked files to your commit. Run <code class="language-plaintext highlighter-rouge">Git add &lt;file_name&gt;</code> if you want to add specific files.</p>

<p>If you accidentally run Git add on something you don’t want added you can run Git reset to remove your additions.</p>

<blockquote>
  <p>[!warning]- Practical Shortcut 4
Adding changes and files is often easier in a GUI. Every good GUI will show you what changes were made in the files and will show you a good list of your changes as well. In all, commits are a good task to undertake in a GUI.</p>
  <h3 id="git-commit">Git commit</h3>
  <p>Git commit takes all of your staged changes and creates a commit out of them. It attaches this commit to the end of your current branch and makes this commit the new HEAD of the branch. COMPLICATED? no. It’s just like saving a file. If you want to go back to a previous commit you can use revert just like you can ctrl+z back to a previous version of your file.
<code class="language-plaintext highlighter-rouge">Git commit -m "Your commit message"</code>
Add this message or Git will launch vim and you’ll have to learn how to escape vim (escape -&gt; :q!).</p>
</blockquote>

<p>THATS IT. Don’t complicate commits any more than that. And when in doubt, make your commit even if you’re not sure of it. Then you can move from commit to commit depending on which changes you want to see.</p>

<p>Git stash
This command tucks all of your changes away into a separate location and resets your current directory. This is super useful if you get confused or things start to go awry in your Git you can stash your changes and reset back to the last commit on your branch. Then you can push, pull, branch, or whatever else you need to do but your changes will be saved in your stash.</p>
<blockquote>
  <p>[!warning]- Practical Shortcut 5
Oftentimes getting changes out of a stash is a fool’s errand. A common workaround from stashing is to copy the changes you’ve made to a text file, Git stash, forget about this stash, and then copy the changes out of the text file and paste them into your now clean local repository. It’s messy yes, but development is about simplicity and this is simpler.</p>
  <h1 id="back-to-repositories">Back to Repositories</h1>
  <p>Ok, so we’ve been through creating or cloning a repository, branching from the main, creating commits, and even a little section about merging. Now we’re going to talk about pushing, pulling, and merge requests. Believe it or not there are no new concepts introduced here, we are just running merges across remote and local repositories.</p>
</blockquote>

<p>Why did morons have to complicate these things? Because they have forgotten that the heart of engineering is simplification not complication and they know that if they continue to complicate at a rate that out-group people can’t keep up they’ll always feel superior to the people who aren’t in the in-group that sacrifices all of their free time to invent ridiculous new concepts to ever-shrink their in-group. “But Bryce don’t highly specialized fields need a highly specialized vernacular to convey complex concepts quickly?” No, these people want to feel superior and for that reason they never will be, speak to any snooty nerd and you will instantly understand this.</p>

<p>To simplify the above, semantic-andys make everything worse.</p>

<h3 id="git-pull">Git pull</h3>
<p>Git pull is (simply) a fetch and a merge. Fetch is like clone in that you’re downloading from a remote repository but fetch means that you only download changes instead of the full project. Merge is what we talked about before, putting the differences from some commit into our desired commit.
<code class="language-plaintext highlighter-rouge">Git pull origin main</code>
Here we’re telling Git to fetch and merge all of the changes from the remote repository we have defined and nicknamed ‘origin’, at the repository’s branch named ‘main’, at the most recent commit into our local current branch. THAT’S IT.
origin repo &gt; main branch &gt; most recent commit —-&gt; local repo &gt; current branch</p>

<blockquote>
  <p>[!warning]- Practical Shortcut 6
This is simple if you are developing on 2 different machines and you need to get changes from your remote repository but you never make changes on both machines at once. You won’t ever run into merge conflicts. 
Merging conflicts is best done in GUIs.</p>
</blockquote>

<blockquote>
  <p>[!warning]- Practical Shortcut 7
If you find that merge conflicts are really killing your productivity then use the stash shortcut explained above. Stash all of your changes, pull for the most recent, write your changes over the top of what you’ve pulled. Don’t wade in the awful merging conflict resolution, then rebasing, then you have to push because your merging and rebasing made 3 different brand new commits and now your local is different than your remote despite the contents being the exact same because you’ve got 3 commits that your remote doesn’t know about. woops, got carried away.</p>
</blockquote>

<h3 id="git-push">Git push</h3>
<p>Git push puts your current local branch onto the remote repository. There are 3 scenarios we might push changes to our remote.</p>
<h4 id="git-push-origin-main">Git push origin main</h4>
<p>Use this command if you are working in your main branch and you’re comfortable making changes directly to it. This is the simplest possible way to push changes but it’s really only possible if you’re abstaining from making new branches and you’re working on main.</p>
<h4 id="git-push-origin-some_branch">Git push origin some_branch</h4>
<p>Use this command if you’re working on a different branch from main. Then on Github you can create a pull request (called a merge request on Gitlab) and get your branch changes into main. This is the most common way I’ve seen professional developers do things, it makes for really easy code reviews because they’re hosted on a website everyone can access instead of your local.</p>
<h4 id="git-pull-origin-main---git-push-origin-main">Git pull origin main -&gt; Git push origin main</h4>
<p>If you have changes in your remote that you don’t yet have in your local you need to catch up before you push to main. This is because the push to main won’t go through unless you are able to fast-forward merge. This is complicated, I know but doing a pull and then a push will work. If need be return to shortcuts 7 and 5, stash your changes, pull main, copy your changes in, push to main.</p>
<h1 id="sample-workflows">Sample Workflows</h1>
<h2 id="simplest-possible">Simplest possible</h2>
<p>We are using only the main branch on both remote and local repositories. This is a perfectly acceptable workflow despite not using branching at all.</p>
<div class="language-plaintext highlighter-rouge"><div class="highlight"><pre class="highlight"><code>Git clone some_repository
# grab your remote repo
for (all of the changes you want to make)
	echo "Hello World" &gt; someFile.txt
	# make some change to the repository
	Git status
	# view the modified and untracked files
	Git add .
	# add all of the untracked and modified files
	Git commit -m "commit message, made some changes"
	# commit your staged changes and leave a descriptive message for posterity
Git push origin main
# put all of your changes into your Git remote
</code></pre></div></div>
<h2 id="using-branching">Using branching</h2>
<p>This workflow uses super simple branching only on your local. You’ll be keeping your remote repository very simple by maintaining only the main branch.</p>
<div class="language-plaintext highlighter-rouge"><div class="highlight"><pre class="highlight"><code>Git clone some_repository
# grab your remote repo
for (each feature you want to add)
	Git checkout -b some_branch_name
	# create and checkout a new feature branch
	for (all of the changes you want to make)
		echo "Hello World" &gt; someFile.txt
		# make some change to the repository
		Git status
		# view the modified and untracked files
		Git add .
		# add all of the untracked and modified files
		Git commit -m "commit message, made some changes"
		# commit your staged changes and leave a descriptive message for posterity
	Git checkout main
	# checkout branch you want to merge changes into
	Git merge some_branch_name
	# merge some_branch_name into main
Git push origin main
# put all of your changes into your Git remote
</code></pre></div></div>
<h2 id="the-professional-way">The ‘Professional’ way</h2>
<div class="language-plaintext highlighter-rouge"><div class="highlight"><pre class="highlight"><code>Git clone some_repository
for (each feature you want to add)
	Git checkout -b some_branch_name
	# create and checkout a new feature branch
	for (all of the changes you want to make)
		echo "Hello World" &gt; someFile.txt
		# make some change to the repository
		Git status
		# view the modified and untracked files
		Git add .
		# add all of the untracked and modified files
		Git commit -m "commit message, made some changes"
		# commit your staged changes and leave a descriptive message for posterity
	Git pull origin main
	# Necessary becuase someone has already made changes ahead of you
	# Merges origin main into your local, catching you up to main. Resolve conflicts if they occur.
	Git push --set-upstream "some_branch_name"
	# Push your change to remote on a new (to the remote) branch called some_branch_name
	&gt; Go to Github and create a merge request, review with the team
</code></pre></div></div>
<h1 id="faq">FAQ</h1>
<h2 id="what-if-i-made-changes-before-branches">What if I made changes before branches?</h2>
<p>That’s ok, I do that all the time. You can still create a new branch and check it out and the changes will transfer to that branch so long as you haven’t committed anything yet.</p>

<h1 id="remember">Remember</h1>
<p>When in doubt use the stash trick, it’ll skip most of the tedious stuff for you.</p>]]></content><author><name>Bryce Struttman</name><email>bastruttman@gmail.com</email></author><summary type="html"><![CDATA[A practical Git guide for entry-level users]]></summary></entry></feed>